Using the HERO Monitor
This tutorial introduces the HERO Monitor, a graphical Qt tool for interacting with and monitoring HEROs in your network.
Tip
The HERO Monitor is particularly useful for debugging, testing, and manually controlling HERO devices during development and operation.
The HERO Monitor is a Qt6 application that automatically discovers and displays all HERO devices visible in the network. It provides:
Automatic Discovery: Automatically finds all HERO devices in the network
Tab-based Interface: Creates a dedicated tab for each discovered HERO device
Interactive Console: Embedded IPython console for direct Python HERO interaction
Method Execution: Dynamically generated buttons for HERO methods
Attribute Editing: GUI elements for modifying HERO attributes
Prerequisites
Before starting this tutorial, ensure you have:
Completed the Getting Started with HEROS tutorial
A working HEROS environment
In this tutorial we will explore the core functionality using a HERO created from the herosdevices.hardware.dummy.cameras.CameraDummy device from herosdevices () and
our dummy sensor we built in the previous tutorial:
{
  "rows":[
    {
      "_id": "my_camera",
      "classname": "herosdevices.hardware.dummy.cameras.CameraDummy",
      "arguments": {
        "config_dict": {
          "default": {
            "height": 400,
            "width": 600,
            "frame_count": -1,
            "auto_trigger": false
          }
        }
      }
    },
    {
      "_id": "my_dummy_sensor",
      "classname": "my_sensor.DummySensor",
      "arguments": {},
      "datasource": {
        "interval": 30,
        "observables":{
          "my_sensor_value": {
            "target": "read_value",
            "unit": "°C"
          }
        }
      }
    }
  ]
}
uv run boss -u file://${PWD}/dummies.json --expose --name test_boss
We use the expose argument here and give the BOSS a name. This makes BOSS itself a HERO and we can control it from the hero monitor.
Installing and Starting the Monitor
Install the hero-monitor from our git in your virtual environment with uv:
uv pip install git+https://gitlab.com/atomiq-project/hero-monitor
For this tutorial, you can start it with:
uv run hero-monitor
Tip
The HERO Monitor supports several command line arguments for advanced use like filtering which HEROs to show and setting the realm to show heros from.
Use uv run hero-monitor --help to list all available options.
Main User Interface
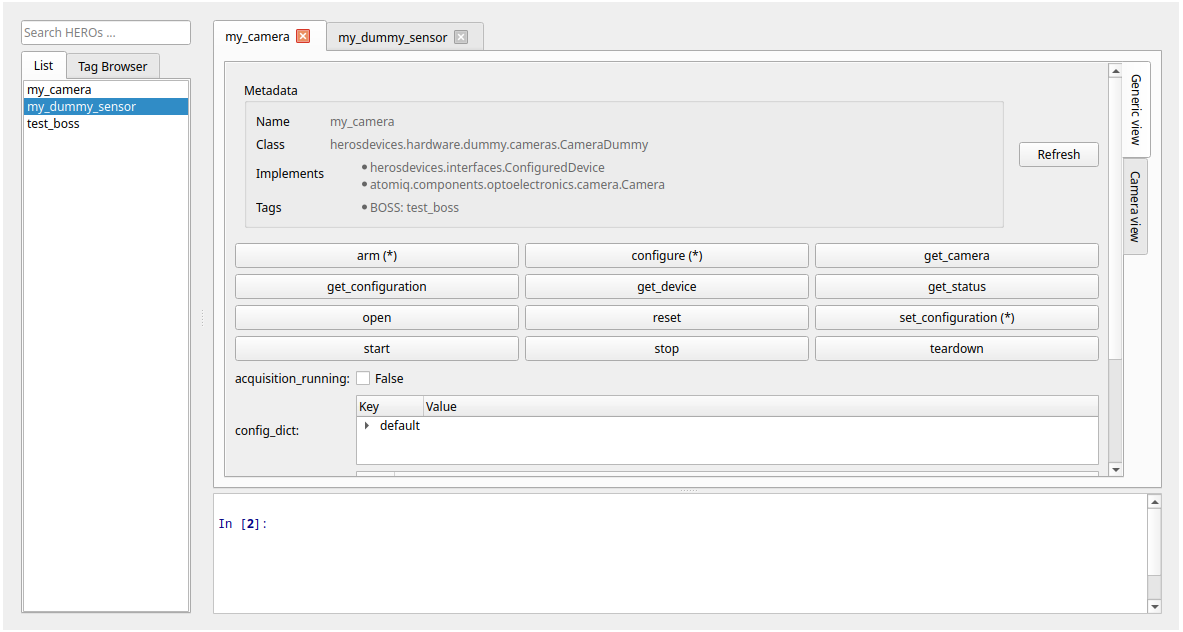
The HERO Monitor has three main areas:
Sidebar: Lists all discovered HEROs with search and filtering capabilities. Double clicking a HERO in this list connects to it and opens it in the main view.
Main View: Shows the selected HERO’s interface with methods and attributes. Methods that take no arguments can directly be called by a button click. If a method would support optional arguments, it is marked by
(*).IPython Console: Interactive Python console. You can interact with the currently opened HERO by using the
objvariable.For demonstration, open our
my_cameraand runobj.get_configuration(). This will showIn [1]: obj.get_configuration() Out[1]: {'height': 400, 'width': 600, 'frame_count': -1, 'auto_trigger': False}
Tip
You can specify a custom startup script for the IPython console by specifying
IPYTHONSTARTUP=my_startup.py hero-monitor
This can for example be used to load custom packages you always want to use.
Views
The monitor provides different pre-defined views based on the HERO’s capabilities.
Tip
For all currently implemented views, refer to the herosmonitor.gui.views module.
There are three view class attributes that are used to determine if a view is used for a given HERO:
VIEW_MATCH_IMPLEMENTS: Matches against an interface implementation (see Metadata).VIEW_MATCH_EVENT: Matches against an event name.VIEW_MATCH_CLASS: Matches against a base class.
Observable Data View
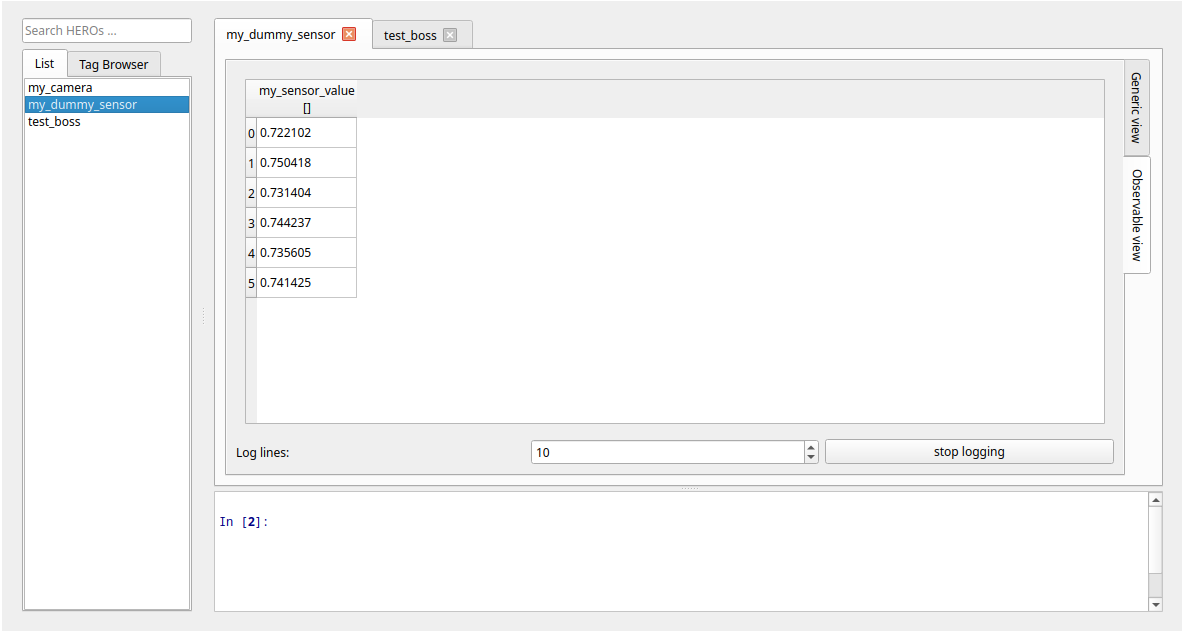
For HEROs that emit observable data through the observable_data event (like our DummySensor).
After pressing start logging, this view collects the event data and visualized it in a table view.
BOSS View
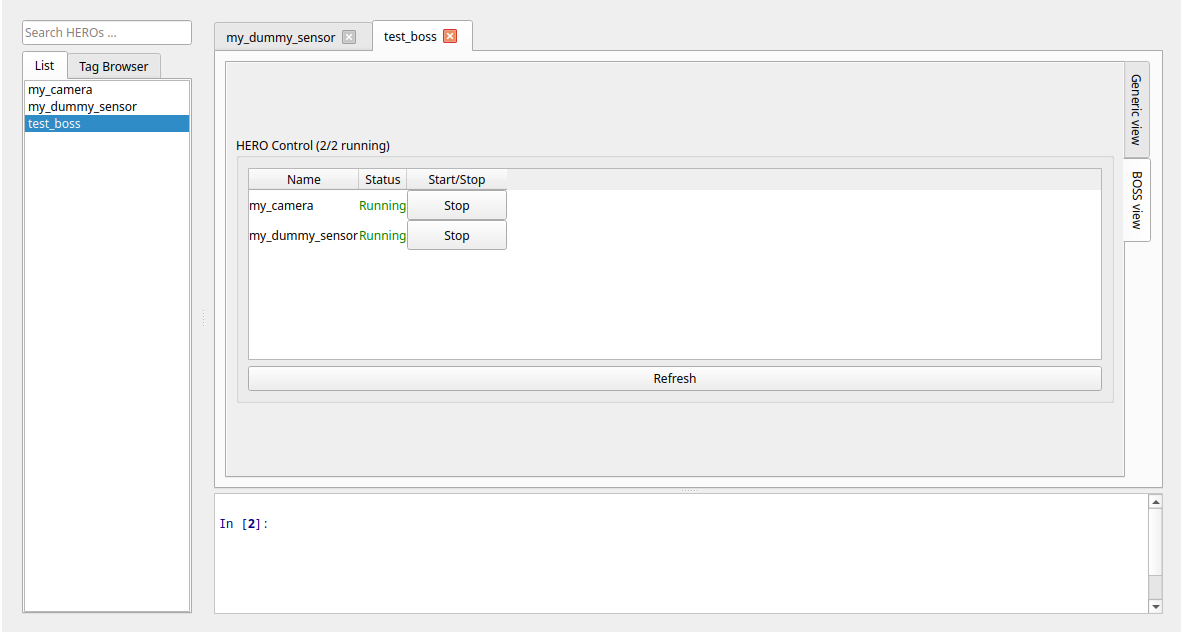
For BOSS instances (started with the --expose argument), this view provides managing capabilities to start/stop individual HEROs and see their current status.
Camera View
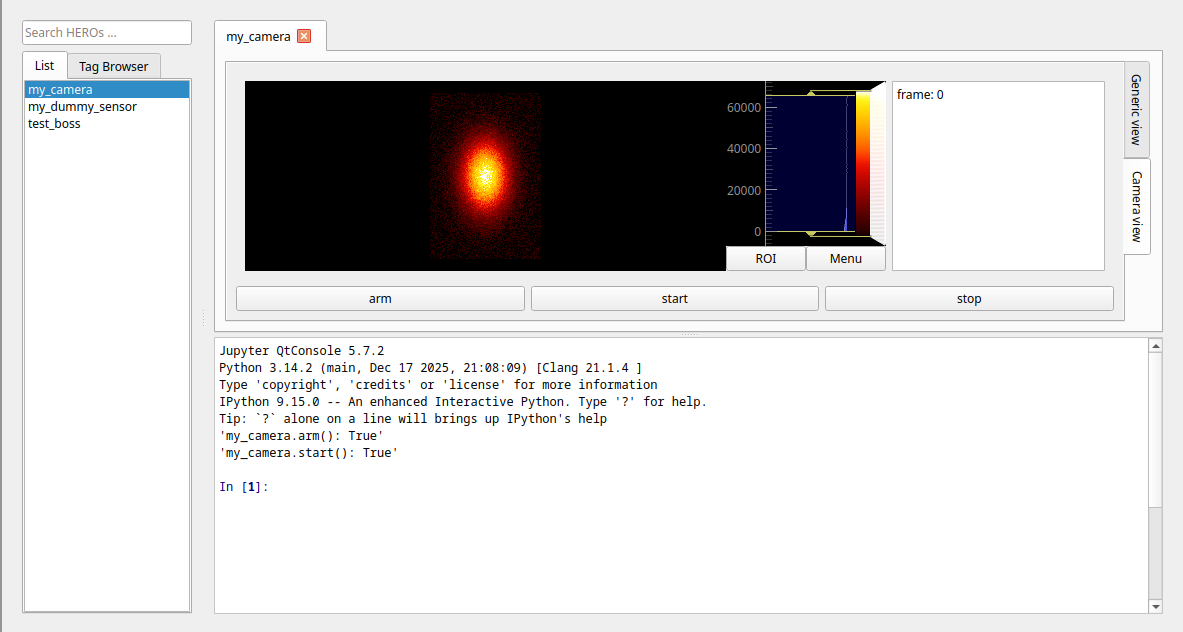
For HEROs implementing camera interfaces (like our CameraDummy), this view includes:
Live image display
Camera control buttons (arm, start, stop)
Image metadata display
Extending the Monitor with Custom Views
Coming soon…